

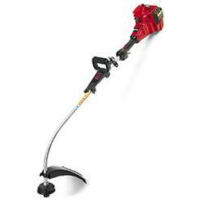
Adjusting the handle
WARNING:
When adjusting the han-
dle, be sure it remains between the trigger
and the safety label. Assist handle must be
positioned only below the arrow.
1. Loosen knob on handle.
2. Rotate the handle on the tube to an up-
right position; retighten knob.
S Store unit and fuel in an area where fuel va-
pors cannot reach sparks or open flames
from water heaters, electric motors or
switches, furnaces, etc.
S Store unit so line limiter cannot accidentally
cause injury. Unit can be hung by the tube.
S Store the unit out of the reach of children
SPECIAL NOTICE:
tions through prolonged use of gasoline pow-
ered hand tools could cause blood vessel or
nerve damage in the fingers, hands, and
joints of people prone to circulation disorders
or abnormal swellings. Prolonged use in cold
weather has been linked to blood vessel dam-
age in otherwise healthy people. If symptoms
occur such as numbness, pain, loss of
strength, change in skin color or texture, or
loss of feeling in the fingers, hands, or joints,
discontinue the use of this tool and seek med-
ical attention. An anti-vibration system does
not guarantee the avoidance of these prob-
Carburetor adjustment
Your carburetor is equipped with limiter caps.
Damage will occur if you turn the needles be-
yond the limiter stops. Carburetor adjustment
is a complicated task. We recommend that
you take your unit to an authorized service
dealer.
ENGINE
S Remove spark plug and pour 1 teaspoon of
40:1, 2-cycle engine oil (air cooled) through
the spark plug opening. Slowly pull the
starter rope 8 to 10 times to distribute oil.
S Replace spark plug with new one of recom-
mended type and heat range.
S Clean air filter.
S Check entire unit for loose screws, nuts,
and bolts. Replace any damaged, broken,
or worn parts.
S At the beginning of the next season, use
only fresh fuel having the proper gasoline to
oil ratio.
OTHER
S Do not store gasoline from one season to
another.
S Replace your gasoline can if it starts to rust.
Clean air filter
A dirty air filter decreases engine perform-
ance and increases fuel consumption and
harmful emissions. Always clean after every
5 hours of operation.
1. Clean the cover and the area around it to
keep dirt from falling into the carburetor
chamber when the cover is removed.
2. Remove parts as illustrated.
NOTE:
Do not clean filter in gasoline or other
flammable solvent to avoid creating a fire haz-
ard or producing harmful evaporative emis-
sions.
3. Wash the filter in soap and water.
4. Allow filter to dry.
5. Add a few drops of oil to the filter; squeeze
the filter to distribute oil.
6. Replace parts.
Air Filter
Cover
Cutting methods
WARNING:
do not crowd the line when cutting around
Cutting safety
WARNING:
Inspect the area before
each use. Remove objects (rocks, broken
glass, nails, wire, etc.) which can be thrown
by or become entangled in line. Hard objects
can damage the trimmer head and be thrown
causing serious injury.
S Use only for trimming, scalping, mowing
and sweeping. Do not use for edging, prun-
ing or hedge trimming.
S Keep firm footing and balance. Do not over-
reach.
S Keep all parts of your body away from muf-
fler and spinning line. Keep engine below
waist level. A hot muffler can cause serious
burns.
S Cut from your right to your left. Cutting on
left side of the shield will throw debris away
from the operator.
S Use only in daylight or good artificial light.
S Use only for jobs explained in this manual.
Declaration of conformity
EU Declaration of Conformity relating to 2000/14/EC
We, Poulan/Weed Eater, Division Electrolux North America, Inc., Texarkana, TX,
75501, USA, Tél. : 1 903 223 4100, declare under sole responsibility that the Jonsered
model HT21 hedge trimmer was assessed in accordance with Annex V of the
DIRECTIVE and from serial numbers 2001—305(N or D)00001 and onwards, conforms to
the provisions of the DIRECTIVE. The net power is 0,306 kW. The measured sound power
is 102,7 dB and the guaranteed sound power is 106 dB.
Texarkana 01—12—17
Always stop unit and disconnect spark plug before performing all of the
OFF position.
carburetor.
adjustment.
adjustment.
adjustment.
muffler outlet screen.
adjustment.
adjustment.
relating to 2000/14/EC
REMEDY
1. Move ON/OFF switch to the ON
position.
2. See «Starting a Flooded Engine»
in Operation Section.
3. Fill tank with correct fuel mixture.
4. Install new spark plug.
5. Check for dirty fuel filter; replace.
Check for kinked or split fuel line;
repair or replace.
6. See «Carburetor Adjustment» in
Service and Adjustments Section.
1. See «Carburetor Adjustment» in
Service and Adjustments Section.
2. Contact an authorized service dealer.
3. Contact an authorized service dealer.
1. Clean or replace air filter.
2. Clean or replace plug
and regap.
3. See «Carburetor Adjustment» in
Service and Adjustments Section.
4. Contact an authorized service dealer.
5. Contact an authorized service dealer.
1. Adjust choke.
2. Empty fuel tank and refill with
correct fuel mixture.
3. Clean or replace air filter.
4. See «Carburetor Adjustment» in
Service and Adjustments Section.
1. See «Fueling Engine» in Operation
section.
2. Replace with correct spark plug.
3. See «Carburetor Adjustment» in
Service and Adjustments Section.
Michael S. Bounds, Director
Product Safety and Standards
— 9 —
Fuel safety
S Mix and pour fuel outdoors.
S Keep away from sparks or flames.
S Use a container approved for fuel.
S Do not smoke or allow smoking near fuel or
the unit.
S Avoid spilling fuel or oil. Wipe up all fuel spills.
S Move at least 3 meters away from fueling
site before starting engine.
S Stop engine and allow to cool before re-
moving fuel cap.
S Always store gasoline in a container ap-
proved for flammable liquids.
Jonsered!
Jonsered!
acces-
Fueling engine
WARNING:
Remove fuel cap slowly
when refueling.
This engine is certified to operate on un-
leaded gasoline. Before operation, gasoline
must be mixed with a good quality synthetic
2-cycle air-cooled engine oil designed to be
mixed at a ratio of 40:1 (2.5%). A 40:1 ratio is
obtained by mixing 5 liters of unleaded gaso-
line with 0,125 liter of oil. DO NOT USE auto-
motive oil or boat oil. These oils will cause en-
gine damage.
When mixing fuel, follow
instructions printed on oil container. Once oil
is added to gasoline, shake container mo-
mentarily to assure that the fuel is thoroughly
mixed. Always read and follow the safety
rules relating to fuel before fueling your unit.
IMPORTANT
Experience indicates that alcohol blended
fuels (called gasohol or using ethanol or
methanol) can attract moisture which leads to
separation and formation of acids during stor-
age. Acidic gas can damage the fuel system
of an engine while in storage. To avoid engine
problems, empty the fuel system before stor-
age for 30 days or longer. Drain the gas tank,
start the engine and let it run until the fuel lines
and carburetor are empty. Use fresh fuel next
season. Never use engine or carburetor
cleaner products in the fuel tank or permanent
damage may occur.
HOW TO STOP YOUR UNIT
S To stop the engine, move the ON/OFF
switch to the OFF position.
HOW TO START YOUR UNIT
WARNING:
turn while starting the engine. Avoid any con-
tact with the muffler. A hot muffler can cause
serious burns.
STARTING A COLD ENGINE (or a
warm engine after running out of fuel)
The trimmer head will
Starting Position
Starter Handle
Choke
Lever
Primer Bulb
1. Set unit on a flat surface.
2. Move ON/OFF switch to the ON position.
3. Slowly press the primer bulb 6 times.
4. Move choke lever to FULL CHOKE posi-
tion.
5. Squeeze and hold trigger through all re-
maining steps.
6. Pull starter rope handle sharply until en-
gine sounds as if it is trying to start, but do
not pull rope more than 6 times.
7. As soon as engine sounds as if it is trying
to start, move choke lever to HALF
CHOKE.
8. Pull starter rope sharply until engine runs,
but no more than 6 pulls. If the engine
doesn’t start after 6 pulls (at the HALF
CHOKE position), move the choke lever
to the FULL CHOKE position and press
the primer bulb 6 times. Squeeze and hold
the throttle trigger and pull the starter rope
2 more times. Move the choke lever to the
HALF CHOKE position and pull the start-
er rope until the engine runs, but no more
than 6 pulls.
NOTE:
If engine still doesn’t start, it is
probably flooded. Proceed to STARTING
A FLOODED ENGINE.
9. Once the engine starts, allow it to run 10
seconds, then move the choke lever to
OFF CHOKE. Allow the unit to run for 30
more seconds at OFF CHOKE before re-
leasing the throttle trigger.
NOTE:
If engine dies with the choke le-
ver in the OFF CHOKE position, move the
choke lever to the HALF CHOKE position
and pull the rope until engine runs, but no
more than 6 pulls.
STARTING A WARM ENGINE
1. Move ON/OFF switch to the ON position.
2. Move the choke lever to the HALF
CHOKE position.
3. Squeeze and hold the throttle trigger.
Keep throttle trigger fully squeezed until
the engine runs smoothly.
4. Pull starter rope sharply until engine runs,
but no more than 5 pulls.
5. Allow engine to run 15 seconds, then
move the choke lever to the OFF CHOKE
position.
Muffler
Identification of symbols
This trimmer can be dangerous! Careless or improper use can cause
The trimmer line can throw objects violently. You can be blinded or
Assist handle
Tube
Shield
Manual
Trimmer head
Jonsered 2036 на алиэкспресс — купить онлайн по выгодной цене
Перед покупкой сравните цены на jonsered 2036, прочитайте реальные отзывы покупателей, ознакомьтесь с техническими характеристиками.
Закажите jonsered 2036 онлайн с доставкой по России: товары с пометкой Plus доступны с ускоренной доставкой и улучшенными условиями возврата.
На Алиэкспресс jonsered 2036 всегда в наличии в большом ассортименте: на площадке представлены как надежные мировые бренды, так и перспективные молодые.
Operating position
ALWAYS WEAR:
Long Pants
Heavy Shoes
Cut from your right to your left.
WARNING:
Always wear eye protec-
tion and hearing protection. Never lean over
the trimmer head. Rocks or debris can rico-
chet or be thrown into eyes and face and
cause blindness or other serious injury.
Do not run the engine at a higher speed than
necessary. The cutting line will cut efficiently
when the engine is run at less than full throttle.
At lower speeds, there is less engine noise and
vibration. The cutting line will last longer and will
be less likely to «weld» onto the spool.
Always release the throttle trigger and allow the
engine to return to idle speed when not cutting.
To stop engine:
S Release the throttle trigger.
S Move the ON/OFF switch to the OFF posi-
tion.
Operator safety
S Dress properly.
glasses or similar eye protection when op-
erating, or performing maintenance, on
your unit (safety glasses are available).
Eye protection should be marked Z87.
S Always wear face or dust mask if operation
is dusty.
S Always wear heavy, long pants, long
sleeves, boots, and gloves. Wearing safety
leg guards is recommended.
When using gardening
Hazard Zone
15 meters
Always wear safety
S Always wear foot protection. Do not go
barefoot or wear sandals. Stay clear of
spinning line.
S Secure hair above shoulder length. Secure
or remove loose clothing or clothing with
loosely hanging ties, straps, tassels, etc.
They can be caught in moving parts.
S Being fully covered also helps protect you
from debris and pieces of toxic plants
thrown by spinning line.
S Stay Alert. Do not operate this unit when you
are tired, ill, upset or under the influence of al-
cohol, drugs, or medication. Watch what you
are doing; use common sense.
S Wear hearing protection.
S Never start or run inside a closed room or
building. Breathing exhaust fumes can kill.
S Keep handles free of oil and fuel.
UNIT / MAINTENANCE SAFETY
S Disconnect the spark plug before performing
maintenance except carburetor adjustments.
S Look for and replace damaged or loose
parts before each use. Look for and repair
fuel leaks before use. Keep in good working
condition.
S Replace trimmer head parts that are
chipped, cracked, broken, or damaged in
any other way before using the unit.
S Maintain unit according to recommended
procedures. Keep cutting line at proper
length.
S Use only 1,6 mm diameter
brand line. Never use wire, rope, string,
etc.
S Install required shield properly before using
the unit. Use only specified trimmer head;
make sure it is properly installed and se-
curely fastened.
S Make sure unit is assembled correctly as
shown in this manual.
S Make carburetor adjustments with lower
end supported to prevent line from contact-
ing any object.
S Keep others away when making carburetor
adjustments.
S Use only recommended
sories and replacement parts.
S Have all maintenance and service not ex-
plained in this manual performed by an au-
thorized service dealer.
Parts list — jonsered gt21 l spare parts [page 2] | manualslib
PARTS LIST NO.
530084489
REPLACES
DATE
8/07/02
530084489- -1/31/02
WARNING
All repairs, adjustments
and maintenance not de-
scribed in the Operator’s
Manual must be performed
by qualified
service per-
sonnel.
15
Ref.
Part No.
1.
530402025
2.
530402028
3.
530069572
4.
530015886
5.
530402026
6.
530094673
7.
530016118
8.
530094742
9.
530015820
10.
530047307
11.
530042093
12.
530402027
13.
530071423
14.
530095176
15.
530049760
16.
530049761
17.
530401958
18.
530401957
19.
530095434
=
n
NEW PART NUMBER FOR THIS IPL
WEED EATER
POULAN
POULAN PRO
Note: Illustration may differ from actual model due to design changes
1
2
3
11
12
10
14
16
17
18
19
Description
Throttle Housing (Right)
Throttle Lock
Kit—Switch
Screw
Throttle Housing ( Left)
Handle
Wingnut
Clamp—Assist Handle
Bolt
Assy—Throttle Leadwire
Spring—Lever Return
Lever—Throttle
Kit—Drive Shaft Hsg. Assy.
Flex—Drive Shaft
Assy—Cutting Head
(Incl. 16—19)
Assy—Hub
Spring—Return
Retainer—Spool
Assy—Spool w/Line
R
R R
R
PARTS LIST
PARTS LIST
PARTS LIST
5
4
13
20
22
21
23
Ref.
Part No.
20.
530069666
21.
530031159
22.
530052286
23.
530015814
24.
530015820
25.
530094543
26.
530016118
Not Shown
—
530088139
530088140
530054766
530038070
MODEL(s)
GT21L
PAGE NO.
6
7
8
9
25
24
Description
Kit—Shield Ass’y.
(Incl. 22,23,24 & 26)
Hex Wrench (5/32)
Line Limiter
Screw
Bolt—Shield
Dust Cup
Wingnut
Operator’s Manual
Europe
Scandinavia
Decal—Shaft Warning
Instruction Decal
1
26
§
PARTS LIST NO.
530084489
REPLACES
DATE
8/07/02
530084489- -1/31/02
70
28
New Style
4
6
32
11
12
52
54
71
56
Spark
51
Arrestor
Kit
55
Ref.
Part No.
Description
1.
530042085
Spring—Starter
2.
530016224
Screw
3.
530053985
Retainer
4.
530015934
Screw
5.
530027569
Handle—Starter
6.
530015810
Screw
7.
530069616
Gasket—Cyl/Carb (kit)
8.
952030249
Spark Plug(RCJ—6Y)
9.
530069616
Gasket—Carb. (kit)
10.
530015941
Retain. Ring—C’shaft
11.
530015675
Screw (Used with old
style muffler guard )
12.
——
Muffler Guard
530037045
old style
530054536
new style
13.
530069886
Assy—Flywheel
14.
530039163
Ignition Module
15.
530036145
Spacer—Ignition Mod.
16.
530015954
Screw
17.
530015828
Washer—Flat
18.
530027953
Coupling—Drive
n
19.
530054753
Assy—Crankshaft
20.
530069615
Kit—Conn. Rod Assy
21.
530036404
Piston Ring
22.
530012414
Assy—Crankcase
23.
530032125
Inner Bearing
24.
530032124
Outer Bearing
n
=
NEW PART NUMBER FOR THIS IPL
WEED EATER
POULAN
POULAN PRO
Note: Illustration may differ from actual model due to design changes
70
29
30
27
60
31
34
23
26
25
24
33
19
53
22
58
Engine
Gasket
Kit
67
57
Ref.
Part No.
25.
530019179
26.
530015945
27.
530036578
28.
530036577
29.
530038602
30.
530036579
31.
530042088
32.
530047491
33.
530069616
34.
530069619
35.
530047659
36.
530016014
37.
530069616
38.
530069665
39.
530054554
40.
530037326
41.
530038102
42.
530015254
43.
530015852
44.
530015887
45.
530037413
46.
530037331
47.
530037292
48.
530015957
49.
530071548
=
K
REFER TO THE SERVICE REFERENCE INDICATED FOR MORE INFORMATION. (LOCATED AT END OF IPL)
R
R R
R
PARTS LIST
PARTS LIST
PARTS LIST
PARTS LIST
63
41
40
8
9
36
35
7
39
38
21
69
68
20
15
37
14
10
18
13
17
2
3
Description
C’case Seal
Retain. Ring C’case
Muffler Body
Muffler Cover
Muffler Baffle—Exit
Muffler Baffle—First
Muffler Spring
Assy—Fan Housing/
Rear Shroud
O—ring—C’case (kit)
Kit—Cylinder
Carb. Adaptor
Screw
Gasket—Cylinder (kit)
Kit—Carburetor Assy
w/ Limiter Cap
Air Box
Choke Mounting Plate
Choke Shutter
Washer
Choke Spacer
Screw
Filter Plate
Air Filter Foam
Air Box Cover
Screw
Assy—Throttle Cable
54
50
48
42
44
47
46
43
45
16
65
5
64
66
1
32
62
Ref.
Part No.
50.
530015780
51.
530069862
52.
530036793
53.
530036792
54.
530069599
55.
530014347
56.
530095646
57.
530069616
58.
530014729
59.
530047278
60.
530015953
61.
530015767
62.
530015768
63.
530038874
64.
530069232
65.
530016080
66.
530069400
67.
530071391
68.
530015162
69.
530069621
70.
530071396
71.
530069571
MODEL(s)
GT21L
2
PAGE NO.
59
49
61
6
Description
Screw
Assy—Fuel Tank
Isolator—Shroud
Isolator—Crankcase
Kit—Line
Assy—Fuel Cap
Assy—Fuel Pickup
Kit—Engine Gasket
Assy—C’case & C’shaft
(Incl. 10,19,22—26)
Assy—Switch Wire
Screw
Screw
Locknut
Bulb Ass’y.—Air Purge
Kit—Rope
Screw
Kit—Starter Pulley
Kit—Spark Arrestor
Piston Pin Retainer
Kit—Piston
(Incl. 21,68 & Pin)
Kit—Muffler
Kit—Fuel Line
§
PARTS LIST NO.
530084489
REPLACES
DATE
8/07/02
530084489- -1/31/02
n
=
NEW PART NUMBER FOR THIS IPL
D
=
THESE PARTS ARE ILLUSTRATED FOR CLARITY.
WEED EATER
POULAN
POULAN PRO
Note: Illustration may differ from actual model due to design changes
Carburetor Assembly #530069665 — WA227
KIT D
KIT D
KIT
KIT
KIT
K
=
REFER TO THE SERVICE REFERENCE INDICATED FOR MORE INFORMATION. (LOCATED AT END OF IPL)
ORDER COMPLETE ASSEMBLY.
R
R R
R
PARTS LIST
PARTS LIST
PARTS LIST
PARTS LIST
2
4
5
KIT
KIT
KIT D
KIT D
Ref.
Part No.
1.
530069838
n
2.
530038403
3.
530069844
4.
530035341
5.
530035342
MODEL(s)
GT21L
3
PAGE NO.
Carb.
Gasket/
Repair
Diaph.
Kit
Kit
1
3
Description
Carburetor Repair Kit
( KIT=Indicates Contents)
Limiter Cap
Gasket/Diaphragm Kit
( D Indicates Contents)
Needle
Spring
§
PARTS LIST NO.
530084489
REPLACES
DATE
8/07/02
530084489- -1/31/02
WARNING
All repairs, adjustments
and maintenance not de-
scribed in the Operator’s
Manual must be performed
by qualified
service per-
sonnel.
15
Ref.
Part No.
1.
530402025
2.
530402028
3.
530069572
4.
530015886
5.
530402026
6.
530094673
7.
530016118
8.
530094742
9.
530015820
10.
530047307
11.
530042093
12.
530402027
13.
530071423
14.
530095176
15.
530049760
16.
530049761
17.
530401958
18.
530401957
19.
530095434
=
n
NEW PART NUMBER FOR THIS IPL
WEED EATER
POULAN
POULAN PRO
Note: Illustration may differ from actual model due to design changes
1
2
3
11
12
10
14
16
17
18
19
Description
Throttle Housing (Right)
Throttle Lock
Kit—Switch
Screw
Throttle Housing ( Left)
Handle
Wingnut
Clamp—Assist Handle
Bolt
Assy—Throttle Leadwire
Spring—Lever Return
Lever—Throttle
Kit—Drive Shaft Hsg. Assy.
Flex—Drive Shaft
Assy—Cutting Head
(Incl. 16—19)
Assy—Hub
Spring—Return
Retainer—Spool
Assy—Spool w/Line
R
R R
R
PARTS LIST
PARTS LIST
PARTS LIST
5
4
13
20
22
21
23
Ref.
Part No.
20.
530069666
21.
530031159
22.
530052286
23.
530015814
24.
530015820
25.
530094543
26.
530016118
Not Shown
—
530088139
530088140
530054766
530038070
MODEL(s)
GT21L
PAGE NO.
6
7
8
9
25
24
Description
Kit—Shield Ass’y.
(Incl. 22,23,24 & 26)
Hex Wrench (5/32)
Line Limiter
Screw
Bolt—Shield
Dust Cup
Wingnut
Operator’s Manual
Europe
Scandinavia
Decal—Shaft Warning
Instruction Decal
1
26
Replace spark plug
Replace the spark plug each year to ensure
the engine starts easier and runs better. Set
spark plug gap at 0,6 mm. Ignition timing is
fixed and nonadjustable.
1. Twist, then pull off spark plug boot.
2. Remove spark plug from cylinder and dis-
card.
3. Replace with Champion RCJ-6Y spark
plug and tighten securely with a 19 mm
socket wrench.
4. Reinstall the spark plug boot.
Air Filter
Screws
Replacing the line
1. Move the ON/OFF switch to the OFF
position.
2. Disconnect the spark plug lead wire.
3. Remove spool by firmly pulling on tap but-
ton. Clean entire surface of hub and
spool. Replace with a pre-wound spool, or
cut a length of 6 meters of 1,6 mm diame-
ter line.
WARNING:
string, etc., which can break off and become a
dangerous missile.
4. Insert one end of the line about 1 cm into
the small hole on the inside of spool.
Small
Hole
Line in
Notch
Hub
WARNING:
steps after each use:
S Allow engine to cool before storing or trans-
porting.
S Store unit and fuel in a well ventilated area
where fuel vapors cannot reach sparks or
open flames from water heaters, electric
motors or switches, furnaces, etc.
S Empty fuel tank before storing or transport-
ing the unit.
S Store unit and fuel well out of the reach of
children.
S Store unit with all guards in place. Position
unit so that any sharp object cannot acci-
dentally cause injury.
SEASONAL STORAGE
Prepare unit for storage at end of season or if
it will not be used for 30 days or more.
If your unit is to be stored for a period of time:
S Clean the entire unit before lengthy stor-
age.
S Store in a clean dry area.
S Lightly oil external metal surfaces.
Never use wire, rope,
Spool
Line exit hole
Storage
Perform the following
5. Wind the line evenly and tightly onto the
spool. Wind in the direction of the arrow
found on the spool.
6. Push the line into the notch, leaving 7 — 12
cm unwound.
7. Insert the line into the the exit hole in the
hub as shown in the illustration.
8. Align the notch with the line exit hole.
9. Push spool into hub until it snaps into
place.
10. Pull the line extending outside of the hub
to release it from the notch.
Transporting and storage
S Allow the engine to cool; secure unit before
storing or transporting in vehicle.
S Empty fuel tank before storing or transport-
ing the unit. Use up fuel left in the carburetor
by starting engine and letting it run until it
stops.
WARNING:
Make sure unit is proper-
ly assembled and all fasteners are secure.
Examine parts for damage. Do not use dam-
aged parts.
It is normal for the fuel filter to rattle in the
empty fuel tank.
Finding fuel or oil residue on muffler is normal
due to carburetor adjustments and testing
done by the manufacturer.
Деталировка (взрыв-схема) бензопилы jonsered (джонсеред) 2036 в интернет-магазине
Запчасти jonsered для gt21 l триммер jonsered купить ремонт в спб сервис jonsered
2 ПОРШЕНЬ, ЦИЛИНДР, КАРБЮРАТОР, СТАРТЕР, МАГНЕТО Триммер JONSERED GT21 L
Триммеры husqvarna, jonsered, partner
 | Интернет-магазин. Профессиональный инструмент. |  | ||||||||||||||||||||||||||||||||||||||||||||||||||||||||
||


Jonsered cc 2036 цена, характеристики, видео обзор, отзывы
Перед приобретением Jonsered CC 2036 по самой низкой цене, изучите характеристики, видео обзоры, плюсы и минусы модели, отзывы покупателей.


